Pages

Friday, 19 June 2026

Hello Summer!


Hi Crafty friends!

Temperatures are heating up and have been in the 100s here every day this week, so this month's kit from Hero Arts with it's cute summer theme was perfect timing and I have been totally inspired!   The pool effect stencils are so clever, and just by layering up all three stencils with slightly different shades of blue, it gives this really cool water effect.  It also lends itself beautifully to be a shaker card so I couldn't wait to create one using some blue sequins that have been in my stash for ages and which turned out to be the perfect addition here.  All the other dies which cut the umbrella, flip flops, beach ball, diving board, sunbather and the float are also incuded in the kit so I cut those from scraps of colored cardstock and added them in and around the pool.  I stamped and cut a sentiment and popped it up on a bit of foam tape to add a little more dimension.  So cute!  


Here's another card I made using the same set and I just dry embossed some lines on the pink layer to look like tiles around the pool.  

I could have spent the rest of the afternoon just coming up with card ideas for these cute pool themed dies, however, the kit also comes with another large die so I had to try that out as well.  

I used a piece of card stenciled with the pool pattern for the background on an A2 sized card base and then assembled all the die pieces and just added her to the front.  This is a large die so it fills a card front beautifully with not much else needed.  I cut the hat and the girl's head and body out of kraft cardstock and did a little ink blending with some brown distress ink to add a little dimension and then did the same with some pumpkin colored ink on her hair which I cut from a golden yellow cardstock.   I cut her dress and the ribbon around her hat in two shades of blue and then the sentiment from white, layering onto the shadow cut once again from kraft.  I popped them up on some foam tape and added them to the rim of her hat.  Finally, I added her eyelashes, cut in black, just below the brim of her hat and made her lips look shiny by adding a bit of packing tape to a scrap of pink card before cutting out.  The elements for her fruity drink are also included in the kit so you can make it whatever you want.  Today she is drinking a refreshing mango smoothie!

I can't decide which one I like best.  I love them all!  What do you think?  Which one is your favorite?

Thanks so much for stopping by and hope to see you next time!

TTFN
Bev x


Tuesday, 2 June 2026

Legen-DAIRY!


Hello again!  These blog posts are becoming like buses aren't they? ... you wait for ever for one and then two come along at once 😜 

Another set of stamps and dies that have been languishing on my desk since March is the Milk It! kit from Hero Arts.  Such a CUTE set and I love the cow/milk theme obviously.  I have been dying to make a card with it ever since it landed in the mail box but just didn't get round to it before our trip in April and then since we've been back I completely forgot all about it.   It was only when I was looking for inspiration on the Hero Arts website that I came across this blog post featuring a card by Channin Pelletier and remembered that I had this kit and knew that this was just what I wanted to create.

Channin has created an excellent tutorial on YouTube which I followed to make this adorable milk carton card which uses acetate for the carton so you can see the 'milk' pouring out. 

The black ink stenciling does take quite a bit of time to fully dry so as Channin mentions in her video, you need to be really careful to avoid transfer on to your cutting plates and then subsequently onto your paper (which I definitely did not do ... **ahem) so in order to be really safe I would recommend maybe doing your stenciling a little while before and leaving it to fully dry before cutting your panels.   Clearly though I am far too impatient for that, so if you are the same you might want to have that cloth handy and make sure you wipe your plates thoroughly between cuts! 


using a sticky mat definitely makes stenciling easier, especially
 when using black ink which seems to get everywhere!

This card has quite a few steps and is a little more time consuming than a clean and simple style card but the end result was definitely worth it and I figured if I was cutting one, I may as well cut two so made one in pink at the same time.  Really pleased with how they turned out!


Coincidentally, a new milk shake place recently opened up near us so I have arranged to meet Youngest there this afternoon to check it out (purely in the interest of research you understand 😉).  How appropriate!  

Thanks for dropping by and hope to see you next time!

TTFN

Bev x

Monday, 1 June 2026

SHAKE, SHAKE, SHAKE!


Summer has finally arrived here in Arizona!  This will be our 11th summer here and they certainly do not get any easier with each one seemingly hotter and longer than the last!   I long to be in one of those places where summer means long balmy days spent outside in the garden with a good book or leisurely walks in the warm sunshine or perhaps even a picnic in the park.  Bliss!  Let's be realistic though - does such a place exist?  I am from England, where if you were lucky, you might get 3 days in a row of that before it got unbearably humid and oppressive for another few days before it reverted back to grey skies, rain and the inevitable period of "is anyone else chilly?  Shall we put the heating back on?"!

Here in Phoenix however, summer generally means hibernating indoors with the AC blasting and outdoor activities are limited to a couple of short hours first thing in the morning (and by first thing, I mean dog walks at 5.30am!  Ugh).  This year, however, instead of dreading the very real possibility of 110+ temperatures for weeks on end and wishing away the whole of June through September, I decided I needed to have a word with myself and come up with activities which both evade the heat and also bring me joy so that I can look forward to each day and actually enjoy the summer instead of just wishing it away as quickly as possible!  Time is precious and life is for living!

Of course one of the benefits of being up and about so early, is longer days and more hours to spend on my most favorite activity of all - crafting!  YAY!  I love all things paper obviously, but also on my list is to catch up with my digital scrapbook journals, delve further into hybrid scrapbooking, finish knitting that blanket that I started 3 years ago (I've gone off it already and not loving the 'battleship grey' wool I chose at the time **eye roll**) and learn to crochet! Plenty to last right through summer and beyond!

As well as creating, I also love to write and I suddenly remembered the crafty blog that I started several years ago but have seriously neglected of late - does anybody still read blogs even? Let me know. 

Oh.  Just noticed that the last post was almost five years ago ... sorry what? FIVE YEARS?!? Holy Macaroni Batman!  How did that happen?!   

Anyway, as I have a craft room which is bursting at the seams with 'stuff', a lot of which I have yet to play with, why not start there?  Today's project utilizes last month's subscription kit from Hero Arts which was languishing on my desk unopened, and as my stash of birthday cards is running low I decided to start with the large Happy Birthday die, which is the perfect size for using as the main card focus, and make a shaker card ... or 3 as it turned out!  Well, who doesn't love a shaker card?  I didn't quite have the right color sequins to coordinate with the card from the kit but trying hard to use what I have and they kind of work I think?  There are lots more great birthday themed items in the kit that I can't wait to work with, including a large present die which I think might be next!


If you made it this far, thanks for sticking with it and hope to see you again next time!

TTFN

Bev x


Wednesday, 4 August 2021

Counting down to Christmas!


Just finished this cool Advent Calendar following the brilliant tutorial from Maymaymadeit.com.  Isn’t it cute?!  I love that the 24 little ‘pizza boxes’ will hold a more substantial surprise and that it can be reused each year (although I am planning on filling it up with treats for College Boy so will probably never see it again 😂). 


I used some Christmas papers from my stash to cover the chipboard for the book which I have had FOREVER and then some gorgeous winter watercolor images that I discovered recently on The Hungry JPEG  (currently just $1!) which I downloaded and then printed out on watercolour paper. 


These soft images are truly gorgeous!


 I decorated the front using some of the new Nature’s Garden Gnome stamps and dies from Crafter’s Companion.  All of these images are super cute!  


Although this was quite a lengthy project, I love it so much I might make another one for myself and fill it with mini beauty treats from ‘Santa’ 😉

Thanks for visiting!

Bev x

Wednesday, 31 March 2021

Friendly Flowers!


It seems to be a sad reality of late that I am needing to send a lot more sympathy and condolence cards 😢 and as my stash of these is becoming rapidly depleted,  I needed to add a couple of new ones. 

I wanted to keep these fairly flat so that they could just be popped into the mailbox at a moment's notice with standard rate stamps, which I always try to have on hand, thus avoiding any last minute trips to the Post Office for additional postage because they are too thick or heavy.   I wanted to use a larger stamped image that I could color and add as a flat layer to a plain card base and the new Friendly Flowers stamp set from this month's Simon Says Stamp card kit was perfect.

Friendly Flowers

I began by adding a narrow gold foiled border onto a piece of cream cardstock using my Cricut Maker  and then I stamped the large flower image with Versamark ink and heat embossed with the cream embossing powder, also included in the kit.   I colored the image with my Promarker alcohol markers and then added a sentiment, this time embossing with matte gold.   I matte a piece of pale pink patterned paper onto a cream notecard (both also from the card kit) for the base, but then decided that it needed just a little dimension, so cut out the middle section of the colored layer and popped it up slightly on a thin double sided foam tape which I liked much better.  Finally, I added a few sequins, which lay much flatter than crystals, using a dot of art glitter glue.  


I usually only stamp and color onto white cardstock, so this was a first for me.  I like the finished result and think the cream card definitely gives it a soft vintage look.  Of course I then had to make another one on white card this time so that I could make a comparison 😊 


Two slightly different looks but using the same stamp set and the same color markers.  I think on balance, I prefer the white one.  What do you think?  Which one is your favorite? 

Thanks so much for stopping by today!

Stay safe!

Bev x


Sunday, 17 January 2021

A Victoria Sponge just in time for tea ...!

 Hey friends!  Happy Sunday!

College Boy announced that he is paying a visit this afternoon with his girlfriend, so I thought I would knock up a quick Victoria Sponge for tea.  You can’t go far wrong with a Victoria Sponge can you and it takes no time at all to cobble together using ingredients that are pretty much always to hand.


In case you’ve never made one before (and if not, where have you been?!), it couldn’t be simpler!  I tend to use the ‘all in one’ method (which basically means you just chuck everything in the bowl together and mix) as find that it gives a lighter texture which I prefer, but you can totally make the traditional way of creaming butter and sugar before adding eggs and flour if you prefer.  I would normally use a good quality strawberry jam (I like Bonne Maman) to sandwich the sponges together however as I had just made a batch of lemon curd a couple of days ago (in an effort to make a dent in the bumper crop of lemons we have on our tree at the moment!) I decided to use that today.  Anyway, below are the quantities  and method I used in case you want to have a go at making one yourself 😊

Ingredients:

8 oz butter, softened to room temperature
8 oz castor sugar
8 oz self raising flour
1 rounded teaspoon of baking powder
4 eggs
1 teaspoon good vanilla extract 
2 tablespoons of milk 

Method:  
1. Preheat oven to 350 deg F/180 C.  Grease and line 2 x 8” sandwich tins (at least 2” deep)
2. Add all ingredients, except the milk, to the bowl of a stand mixer (or you can use a large mixing bowl with electric hand beaters, or even a food processor but be careful not to over mix)
3. Beat everything together for 1-2 mins until well mixed and then add enough of the milk to give the batter a soft dropping consistency 
4. Spread evenly between the two prepared sandwich tins and bake in centre of oven for around 25 mins or until a skewer inserted into the centre of the cakes comes out clean.
5.  Remove from oven and cool in the tins for 5 minutes before turning out onto a cooling rack.
6.  When completely cold, spread one half with the jam of your choice - strawberry/raspberry or lemon curd as I have used here - and sandwich the other half on top and sprinkle with a little caster sugar. You can switch up the fillings depending on what you fancy at the time.  Adding some freshly whipped cream and sliced strawberries on top of your strawberry jam turns this teatime cake into an extra special dessert! (Just saying 😏)

Easy peasy!  

There’s still time to whip one up in time for tea if you get a move on ... give it a go and let me know what you put in yours!

Thanks for stopping by
TTFN
Bev x


Sunday, 10 January 2021

Winter Wishes!


Hello Friends and a Happy New Year to you!   Let's hope this one is an improvement on last year and that Lockdowns and Stay at Home orders will soon be a thing of the past.  Although we are not under any mandatory restrictions here in Arizona at the moment, we are trying to be as careful as we can and therefore spending as much time as possible at home.  I don't mind though as for me that means more crafting time - yippee!  Every cloud ... 😉


This week I have been playing with some new Ranger Distress Oxide inks that I recently purchased and have to say they might just be my new favorite!  As well as being really easy to work with (they blend beautifully), you can get some really cool effects due to their oxidizing properties when you add water.   

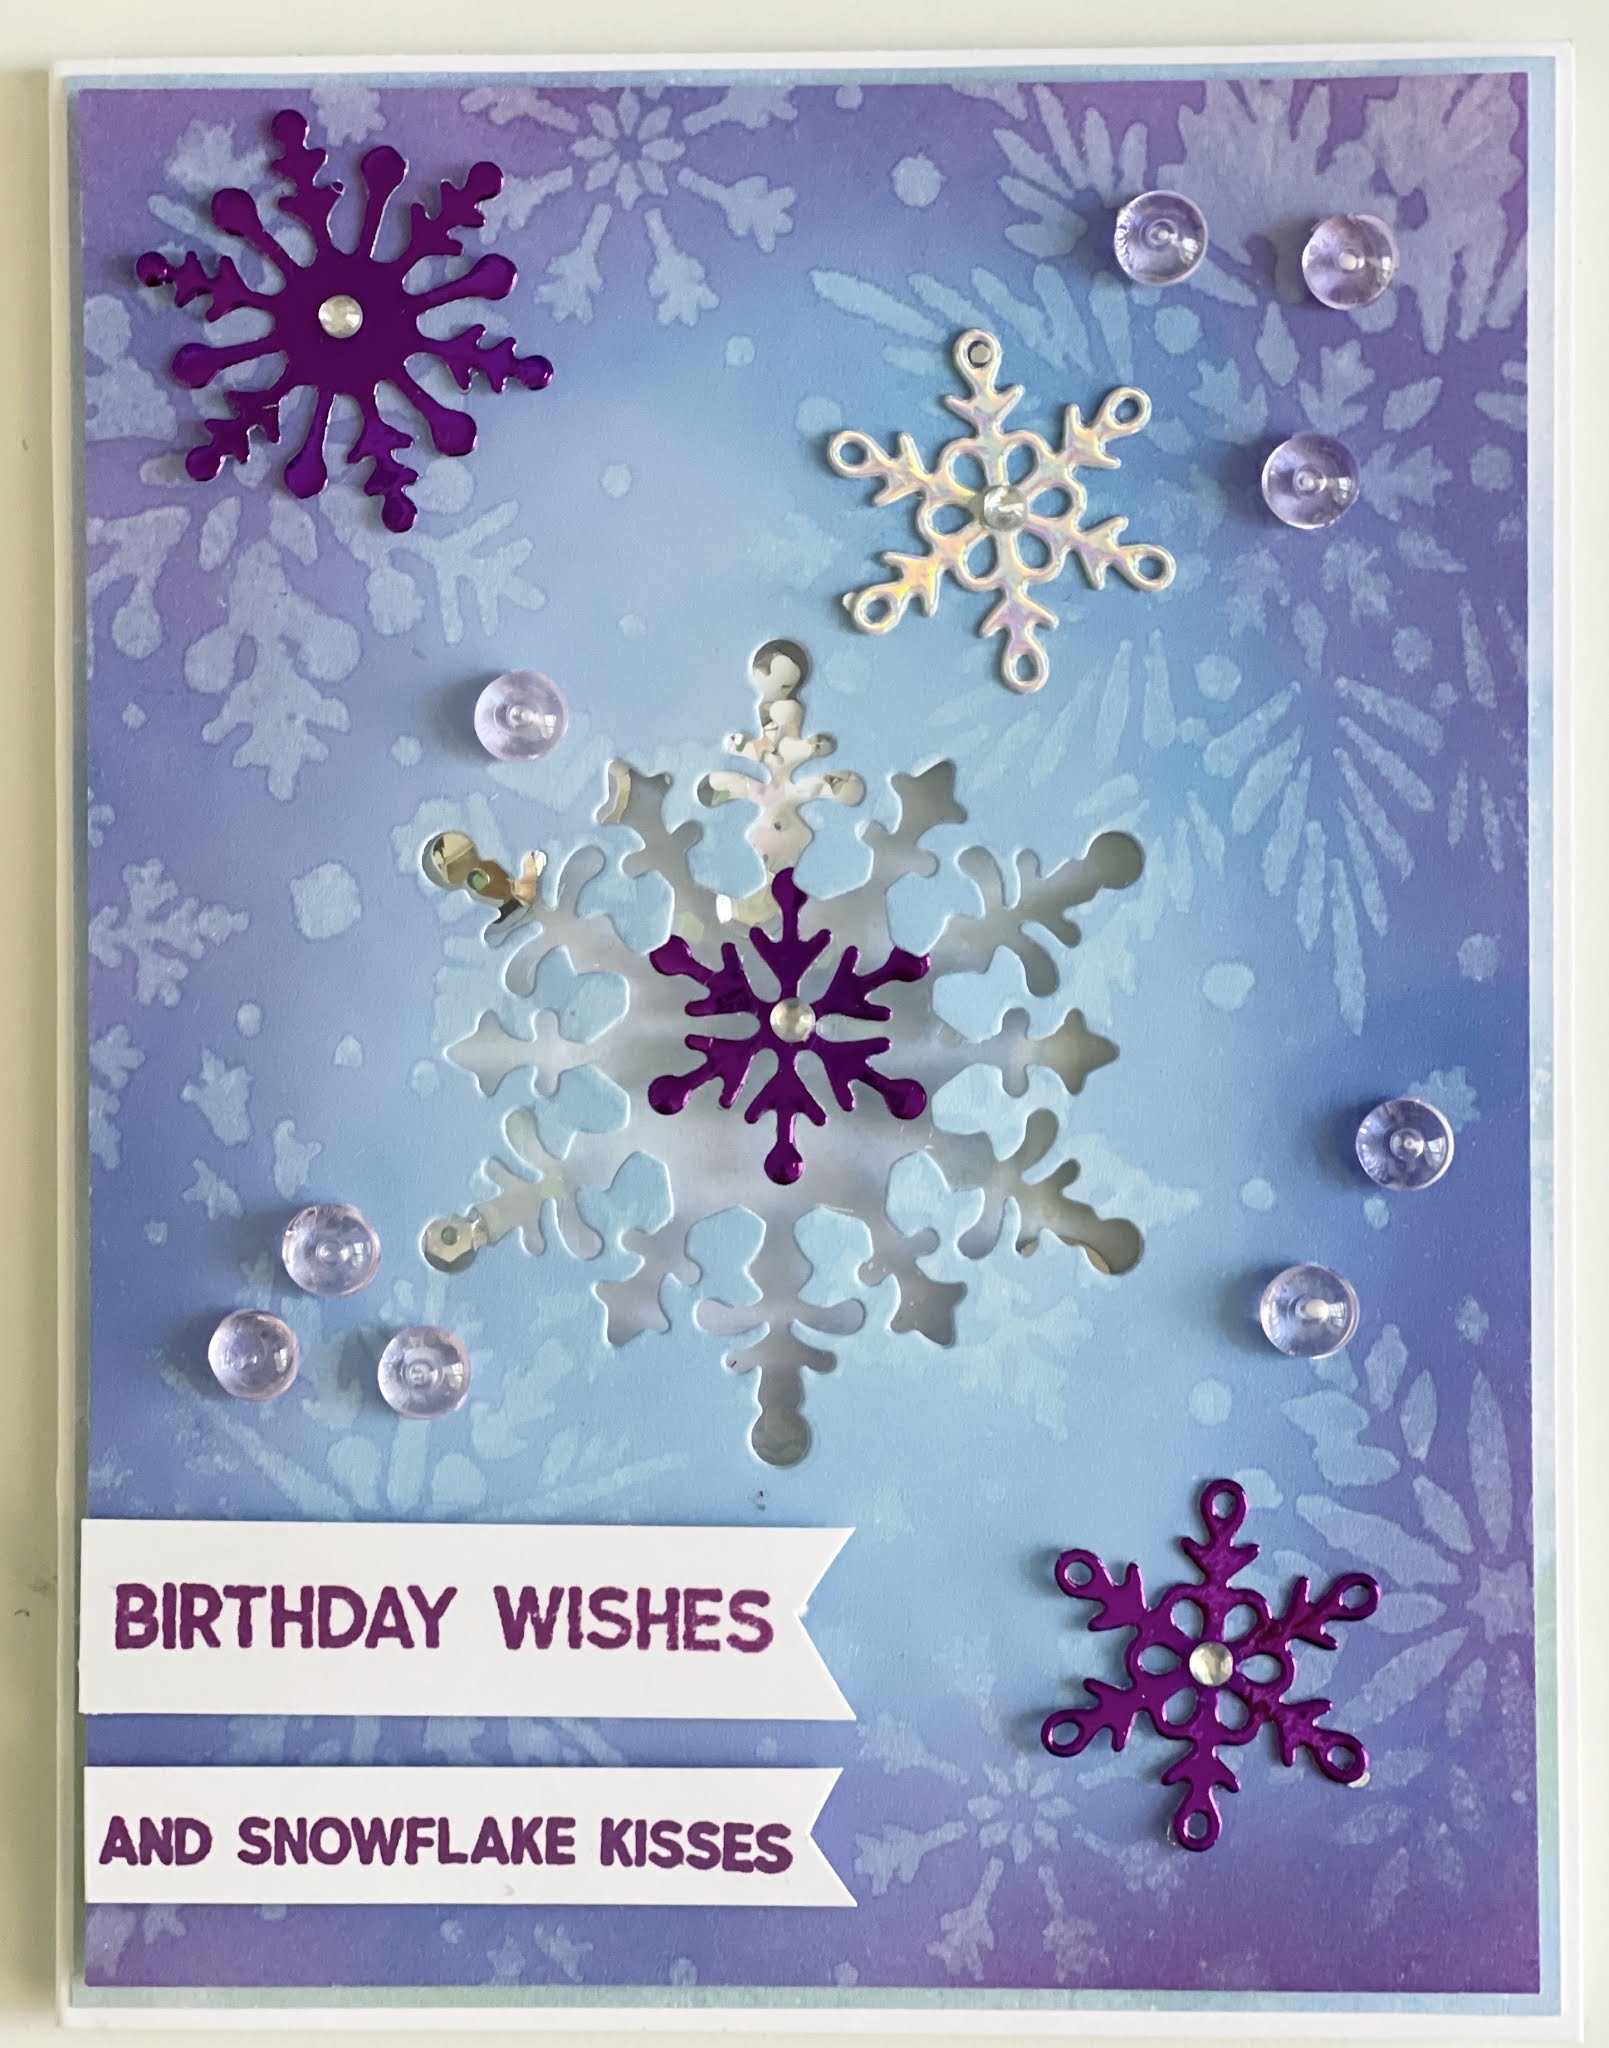
I recently watched a video by Jennifer McGuire where she showed how to stamp/stencil with water onto distress oxide backgrounds and I couldn't wait to give it a try.  (I have linked to that video here).  I blended Tumbled Glass, Salty Ocean and a little Seedless Preserves around the edges to create the inky background and then spritzed with water through a snowflake stencil from the Sara Signature Glittering Snowflake collection at Crafters Companion.  The water reacts with the ink to leave this cool oxidized effect.  So pretty.


Using metal dies from the same Glittering Snowflake collection, I cut out the center and matted onto a scrap of blue glitter card before adding to a plain white A2 card base and then cut a few smaller snowflakes from some iridescent silver card and added a few crystals 


Finally I stamped a sentiment, again using stamps from the same collection and heat embossed with silver tinsel embossing powder.


I loved this effect so much, I created another background in exactly the same way, except this time I used more of the Tumbled Glass and Seedless Preserves and only a little Salty Ocean to make a lighter, softer background.  For this card, I cut a large snowflake from the center and made it into a shaker window filled with chunky glitter and sequins and used scraps of purple metallic card to cut smaller snowflakes for embellishment.  I used the same Seedless Preserves Oxide Ink to stamp the sentiment and finished it off with a few tiny crystals and some lilac dew drops. 💜


I think these will make great cards for those Winter birthdays on my list!

Thanks for stopping by and hope to see you again next time!

Stay warm, stay safe and stay home!

Bev x

Tuesday, 23 June 2020

Wonderful Watercolor Wings!

Hi friends!

This week I have been continuing my mission to ferret out things hidden deep within the Crafty Cowshed that I had forgotten I had or that I have seldom (or ever!) used.  

This time it was the turn of the Spectrum Noir Aqua markers.  I love the final result that these give when blended out with water but have always found coloring in detailed elements a challenge as I don't seem to have the same control with a paintbrush as I do with an actual pen (and even then it can be questionable at times!)

After watching a few online tutorials though I decided to give them another go, this time trying out a stamping technique using the markers instead of ink pads.  I was really surprised by how much I LOVED the results so thought I would share these with you today in case it inspires someone else to have a go at this easy but effective technique. 

I dug out a couple of butterfly stamps that have been in my stash for ever.  These are large foam stamps that I found tricky to get a consistent impression with when using in the traditional way, but they worked great for this method.  I simply grabbed a few co-ordinating color markers and scribbled the ink directly onto the back of the stamp and then stamped onto a piece of watercolor card.  Then using a damp (not wet) paintbrush, lightly moved the color around on the image until it was all 'colored in'.   Then when completely dry I trimmed the image down, matted onto some gold glitter card and mounted onto a plain white A2 card base using 3D foam tape and then added a sentiment (this one was stamped in Versamark ink and heat embossed with gold glitter embossing powder).  Ta da!  I think its one of my favorite cards ever!


This next example was made in the same way, this time using aqua and purple markers.  I used some purple & blue foil card for the mats, embossing the purple mat with an Anna Griffin floral embossing folder and then added a sentiment popped up on foam tape and a few co-ordinating sequins to finish it off.


I had quite a bit of ink left on my stamp which it seemed a pity to waste so I spritzed it with water and then stamped again on another piece of watercolor card.  A totally different look but equally pretty I think.


Finally, I made one final card using both methods on the same piece of card.  For the sentiment I used a Anna Griffin die cut 3 times in white card stock and then once in fuchsia mirror card and glued them all together to give a raised effect but without having to fiddle with lots of tiny bits of foam tape.


I will definitely be giving this technique a try with other stamps in my collection - I love it!

Thanks for stopping by and hope to see you next time.

Bev x

Thursday, 18 June 2020

Life's a Beach!

Hi Friends!

Thought I would share another card with you today made from the new Crafters Companion Staycation stamp and die sets, available only on HSN for now I think (although I believe they are currently sold out!) Love these cute images so much!  

This card was made using the Life's a Beach set.  Equally as gorgeous as the Happy Camper set I used in my card yesterday.


This time I used started by stamping the cliffs and pier background onto a piece of Neenah Smooth white cardstock using Memento Tuxedo Black ink.  Using my Promarker alcohol pens I colored the images to create a background scene.  In the foreground I used sections of white card that I had colored with Distress Inks and blended to resemble a sandy beach, randomly shaped at the top and then adhered to the background piece (I like to use Art Glitter glue to make sure it is securely glued on).

Next I stamped the two sentiments, also included in the set,  onto the finished background and matted onto a piece of matte gold metallic card and then onto a piece of patterned paper, before glueing onto a 5" x 7" white card blank.

I decided to use the beach hut,  the chair and the sun umbrella to complete my scene and stamped these also with Memento Black ink and cut them out on my Gemini machine using the matching dies.  I colored them with Promarker alcohol pens and mounted onto some 3D foam tape before adding to my beach scene.

There are so many cute stamps in these sets that you could make so many cards from each and no two need be the same!  

Thanks for visiting!

Bev x

Wednesday, 17 June 2020

Hello Campers!

Hi Friends!

My new Crafters Companion Staycation stamp and die sets arrived today from HSN and I couldn't wait to try them out - they are so CUTE!  

Each set includes lots of cute stamps with the matching dies to allow you to create and build up a scene  on your card.  This card is made from the set called  'Happy Camper'.  


I stamped each image onto smooth white cardstock (I use Neenah Classic Crest Solar White) using Memento Tuxedo Black ink (as I will be using alcohol markers to color them), cut them out on my Gemini machine using the matching dies and then colored them with my Promarker alcohol markers.  For the background, I used a simple watercolor wash that I created last week when I was playing with my new paints 😃.  I mounted the images onto some foam tape and positioned on the background and then stuck it down onto a white 4 1/4" x 5 1/2" card blank.

The sentiment is from Taylored Expressions - Simple Strips Background, stamped with Versamark ink onto black cardstock and heat embossed with white embossing powder.

Love it!  So effective and came together really quickly.   I will definitely be making more of these!  

Can't wait to try out the other set now!  Will be sure to share the results when I do.  I believe they are currently sold out so really glad I got them when I did (although now wishing I had bought all the sets!)

Thanks for stopping by!

Bev x

Monday, 15 June 2020

Birthday Bucket List!

Hey friends!

As I mentioned in my previous post, Mr Crafty Cow had a birthday this past weekend and so obviously that meant more guy card inspiration!  This one, I made for The Teen to give his Dad after being inspired by something similar I saw in a card shop a while ago.


I created the top layer in Cricut Design Space by creating a text box for the ‘Birthday Bucket List’ using the Boys will be Boys font and then another text box this time using American Typewriter font for the list.  Once I had them positioned where I wanted them I attached them both to a white layer 4.5” x 6.5” and then flattened to turn it into a Print then Cut layer and cut it out on my Cricut Maker.  I cut the bucket using another Design Space Image in black and silver and dry embossed the top layer to add some texture.  I also found the beer bottles on DS and cut 5 of those, again using the Print & Cut feature.  I added some orange card from my scrap box and mounted the bucket on 3D foam tape, tucking the bottles into the top before adding a few sprinkles of clear seed beads to look like ice around the base.   The Dad sentiment is an Anna Griffin die which I cut separately on my Gemini and added to the front of the bucket.  I matted the finished front panel onto some green card stock 1/4” larger all around and then added it to a white 5” x 7”card base.  

Loved how it came out and will definitely be recreating this one again in the future!

Thanks for stopping by and hope to see you again next time!

Bev x


Sunday, 14 June 2020

One for the guys!

Hi folks 

Just dropping in to share a card that I made this week for a friend (actually, it was to give to my DH for his birthday this past weekend as she couldn’t find anything she liked in the shops 😆).

I don’t know about you but I always find cards for the guys the most tricky.  When I get time to craft, I often start with the intention of making a few men’s cards for my stash so that I always have one on hand when I need one, but then when I find inspiration lacking, seem to just switch to auto pilot and before I realise it have made half a dozen cards for the girls!  Doh!

As this was a special request (and also for Mr Crafty Cow’s special birthday!) I had no choice but to dig deep and crack on.  Clearly though this is the best approach for me as I loved the result ... and so did he!


I created a Z card from white card stock and added mats in gold mirror and navy.  I then used my Cricut Maker to cut/draw all the other elements.  Easy peasy!


Thanks for stopping by and hope to see you again next time.

Bev x

Sunday, 31 May 2020

Under the Sea!

Hey Friends!

Bringing you another card today with a painted background, this time using Spectrum Noir Sparkle Glitter inks.   The sparkle doesn't really come across very well (if at all) on a photograph but trust me, it's there and in real life gives a the most beautiful sparkle and shine!


I blended a combination of Icy Blue, Frosted Rose & Winter Plum inks with a wet paintbrush onto smooth white card to create this background, dabbing off on a paper towel as I went to catch any pools of color that I didn't want.  Once it was dry I spritzed it with water to create the 'bleached' effect in places.  The sparkle of these inks really intensifies as it dries - so pretty - and it immediately made me think of an under the sea theme, but instead of maybe the obvious mermaid, I decided I wanted to use a cute octopus (don't ask me why! 😂)

I found this one on Cricut Design Space (free if you have a Cricut Access subscription) and resized to create one large and two small and mounted them on some foam tape.  I trimmed the background panel down to 3 3/4" x 5" and matted it on some foam tape and then on a piece of hot pink card cut 1/8" larger on both sides.  Then, I mounted both onto a light blue A2 card base.   The sentiment is from an SVG file from Kadoodlebug Designs called 'You're my Squishy' which also comes with several cute sea creatures but on this occasion I decided to go with the Cricut image.  

To finish off my card, I added a few hot pink spots to the octopi with a Fuchsia Promarker pen and topped with some Nuvo glitter drops and added a pair of googly eyes on the larger one.  Finally I added some sparkly shell stickers that I have had in my stash for ever and a day (thinking they are now a bit much but can't remove them as they are stuck on firmly!) and a few flat pearls.

I entered this card into two challenges this week over at Splitcoaststampers.com -  Color Challenge and Free for All challenges.

Thank you for you looking!

See you soon
Bev x

Saturday, 30 May 2020

Wish you were here ...

Hi

How many times in the past have I wished I had more time to craft?!  You would think that currently, when we are spending more time at home than ever,  my craft room would be bursting at the seams with finished projects wouldn't you?  Well, let me tell you, you would be wrong 😐  Aside from the fact that Mr Crafty Cow is currently working from home full time and has commandeered my craft room (which he thinks is his office - clearly deluded), when I do manage to get in there with a whole chunk of time to myself, I just can't seem to get inspired to start anything!    That is until a couple of weeks ago when I discovered the Challenges section on the Splitcoaststampers site 😃.  Just the kick up the backside I needed to get those creative juices flowing again ...!

A couple of weeks ago when I felt the old 'crafters block' creeping in again, I sat with some distress inks, a water brush and some paper and played around with different colors and techniques to create some backgrounds to use on future cards.  When I saw this week's Clean and Simple Challenge  on SCS to use paint on a card, at first I thought I would have to sit this one out as I don't have any 'paints' but then remembered I could totally use the backgrounds I had painted with inks last week.  My eye was immediately drawn to one I had created with stripes of blues and green and although I loved the colors together, I couldn't see what I was ever going to use it for as felt the stripes were too big and bold.  Suddenly though, I knew exactly what this one was to become! 


I created the scene using stamps from SU Sheltering Tree stamped in Versafine Black ink and then added a sentiment from Taylored Expressions stamped with Versamark Ink and embossed in black. 

Sadly as time passes, I find I am needing more and more sympathy cards and after I had created this it seemed a perfect choice for this sentiment.

Thanks for stopping by ... take care of each other and hope to see you again. 

Bev xx

Thursday, 28 May 2020

Spring is in the air!

Hi friends!

Made another tent card - think I might be slightly addicted!  Once you’ve made one and figured out what goes where, they really aren’t too difficult.


This time I used a piece of light green card stock for the base and some papers from Echo Park’s Celebrate Spring paper pack by Lori Whitlock.  The scene in the window is also made from stickers from the same pack.  I just stuck them onto some scraps of white card and fussy cut them out.  The little birdhouse is so cute!  I added the gathered ribbon top and bottom as a finishing touch to disguise the fact that I cut the paper slightly too short! 😀 If you want to have a go at making one I used this tutorial on Splitcoaststamper.com

I thought a ‘Welcome to the Neighbourhood’ sentiment would be perfect for this card and so used one of the sentiments from Taylored Expression’s Simple Strips .  These are a such a time saver - you stamp a whole bunch of sentiments together and then the matching die cuts them all out in one go - genius!  I stamp a bunch at a time and have them in a little pot on my desk ready to use whenever I need one.  This one was also heat embossed with gold tinsel embossing powder.

Thanks for stopping by - hope to see you again!

Bev x

Wednesday, 27 May 2020

No Prob-llama!

Hey Crafty Friends!

Just stopping by today to share a card that I made from a tutorial over on Splitcoaststampers.com


I have never made this type of card before - called a 'tent' card for obvious reasons!  I thought it was a really clever design with an effective 3D look but one that also folds up flat to fit in an envelope.  Cool huh?!


Things are heating up in Arizona this week with temperatures here in Scottsdale set to reach 112°F by Friday 😲 so think this influenced the theme I chose for my card today 😂  I used a piece of sand colored card to make the base and then some cool papers from a DCWV paper pad that I have had for ages and never really used (continuing my goal of using up those neglected supplies!) for the front and inside.  I then stamped and die cut the llama and cacti using the Birthday Fiesta set from Stamping' Up and mounted them on some offcuts of the same sand cardstock shaped to look like sand dunes to make a desert scene.

I loved making it so much, I am now off to make another one! 😀

Thanks for stopping by and take care 'till next time ,,,


Bev x


Thursday, 21 May 2020

Pinwheel Fiesta!


Managed to throw Mr Crafty Cow out of the craft room today (he thinks it's his office bless him #delusional) so that I could get in there to play! 😁

I have been challenging myself to try and create things using items that I have had in my stash for one year or more ... or even better, those things that have I have not had out of their boxes since we moved to the US - over 5 years ago now!

Today, I made a card using a sketch from a book I had completely forgotten I had 😲  Needless to say I then spent the next hour flicking through the pages, oohing and aaahing over all the lovely projects and wondering why I had not picked up this book sooner (too much stuff is the answer)!


I settled upon this particular sketch from the book on which to base my card and was immediately inspired by the circle design.


Last week whilst ferreting around in my supplies for ideas I came across a pile of paper rosettes that I had made eons ago from a Craftwork Cards paper pad and then never really knew what to do with.   I used two of them as the focal point on a 5"x7" plain white card base and added some punched circles from coordinating patterned paper, then finished it off with a stamped sentiment in a bright pink ink.


Really like the result, however, no idea how I would ever post this to anyone!  Think I might be making a card box next ... 🙄


Sunday, 17 May 2020

Congrats Grad!

Well, what a strange time it has been of late!  I hope you are all staying safe and well and finding ways to keep yourselves occupied during this time of uncertainty.   Right now,  looking after our mental health is just as important as looking after our physical health and whilst we are all under various stages of lockdown/stay at home orders, what better way than to lose yourself in a few hours of crafting!

This afternoon, I disappeared into the Crafty Cowshed to make a card for our son, who will be graduating from High School this coming week - albeit via a 'Drive In' ceremony!  I had made him a card a week or so ago, but wasn't really that enamored with it, and whilst looking for inspiration over my morning coffee came across this super cute digi stamp from KLM Designs and knew I had to use it!


As I am hopeless at fussy cutting, I uploaded the digi into the Cricut Design Space app as a Print then Cut image, resized it to fit a 5.5" square card, sent it to my printer and then had my Cricut Maker cut it out for me ... much easier!  I used Promarker alcohol ink markers to color it in and mounted it on a stenciled background, using a cloud template from Simon Says Stamp and some distress ink, on which I had previously printed my sentiment.  The 2020 image also came from the Cricut Design Space library.  I added a mat in gold mirror card and mounted to a white 5.5" square card.

Of course, like most 18 year old boys, he will probably give it the cursory once over,  mutter a quick "thanks" and never give it a second glance! 😆

Hope you have a go at something crafty this week - it really is a great anxiety buster!

Stay safe friends!

Bev x


Saturday, 7 March 2020

Gamer Boy!


It’s our youngest’s birthday tomorrow and so this week I began the dreaded search for inspiration for a male themed card!  Why are they so hard?!  Anyway, happened upon this digi image from Mo’s Digital Pencil which was just perfect for him.  I colored the image with Promarker alcohol markers and matted on some tech themed patterned papers that i have had in my stash for ever. 

Hope he likes it ... although if previous form is anything to go by he will give it a cursory glance, say “oh thanks” and that will be that!  😂. Boys!

Saturday, 13 April 2019

Happy Easter!

Hello friends,

Today I am sharing a few cards I made this week using some cute Miss Kate Cuttable images available on Cricut Design Space and some of the gorgeous Easter papers from two sets I picked up a few weeks ago - Easter Wishes by Lori Whitlock & Happy Easter from Echo Park.

I used the print and cut feature in Design Space to print the cute images and then popped them up on some foam tape on the card bases.  I made a selection of center step cards and regular A2 size and think they turned out super cute!