Pages

Showing posts with label Birthday card. Show all posts

Tuesday, 2 June 2026

Legen-DAIRY!


Hello again!  These blog posts are becoming like buses aren't they? ... you wait for ever for one and then two come along at once 😜 

Another set of stamps and dies that have been languishing on my desk since March is the Milk It! kit from Hero Arts.  Such a CUTE set and I love the cow/milk theme obviously.  I have been dying to make a card with it ever since it landed in the mail box but just didn't get round to it before our trip in April and then since we've been back I completely forgot all about it.   It was only when I was looking for inspiration on the Hero Arts website that I came across this blog post featuring a card by Channin Pelletier and remembered that I had this kit and knew that this was just what I wanted to create.

Channin has created an excellent tutorial on YouTube which I followed to make this adorable milk carton card which uses acetate for the carton so you can see the 'milk' pouring out. 

The black ink stenciling does take quite a bit of time to fully dry so as Channin mentions in her video, you need to be really careful to avoid transfer on to your cutting plates and then subsequently onto your paper (which I definitely did not do ... **ahem) so in order to be really safe I would recommend maybe doing your stenciling a little while before and leaving it to fully dry before cutting your panels.   Clearly though I am far too impatient for that, so if you are the same you might want to have that cloth handy and make sure you wipe your plates thoroughly between cuts! 


using a sticky mat definitely makes stenciling easier, especially
 when using black ink which seems to get everywhere!

This card has quite a few steps and is a little more time consuming than a clean and simple style card but the end result was definitely worth it and I figured if I was cutting one, I may as well cut two so made one in pink at the same time.  Really pleased with how they turned out!


Coincidentally, a new milk shake place recently opened up near us so I have arranged to meet Youngest there this afternoon to check it out (purely in the interest of research you understand 😉).  How appropriate!  

Thanks for dropping by and hope to see you next time!

TTFN

Bev x

Monday, 1 June 2026

SHAKE, SHAKE, SHAKE!


Summer has finally arrived here in Arizona!  This will be our 11th summer here and they certainly do not get any easier with each one seemingly hotter and longer than the last!   I long to be in one of those places where summer means long balmy days spent outside in the garden with a good book or leisurely walks in the warm sunshine or perhaps even a picnic in the park.  Bliss!  Let's be realistic though - does such a place exist?  I am from England, where if you were lucky, you might get 3 days in a row of that before it got unbearably humid and oppressive for another few days before it reverted back to grey skies, rain and the inevitable period of "is anyone else chilly?  Shall we put the heating back on?"!

Here in Phoenix however, summer generally means hibernating indoors with the AC blasting and outdoor activities are limited to a couple of short hours first thing in the morning (and by first thing, I mean dog walks at 5.30am!  Ugh).  This year, however, instead of dreading the very real possibility of 110+ temperatures for weeks on end and wishing away the whole of June through September, I decided I needed to have a word with myself and come up with activities which both evade the heat and also bring me joy so that I can look forward to each day and actually enjoy the summer instead of just wishing it away as quickly as possible!  Time is precious and life is for living!

Of course one of the benefits of being up and about so early, is longer days and more hours to spend on my most favorite activity of all - crafting!  YAY!  I love all things paper obviously, but also on my list is to catch up with my digital scrapbook journals, delve further into hybrid scrapbooking, finish knitting that blanket that I started 3 years ago (I've gone off it already and not loving the 'battleship grey' wool I chose at the time **eye roll**) and learn to crochet! Plenty to last right through summer and beyond!

As well as creating, I also love to write and I suddenly remembered the crafty blog that I started several years ago but have seriously neglected of late - does anybody still read blogs even? Let me know. 

Oh.  Just noticed that the last post was almost five years ago ... sorry what? FIVE YEARS?!? Holy Macaroni Batman!  How did that happen?!   

Anyway, as I have a craft room which is bursting at the seams with 'stuff', a lot of which I have yet to play with, why not start there?  Today's project utilizes last month's subscription kit from Hero Arts which was languishing on my desk unopened, and as my stash of birthday cards is running low I decided to start with the large Happy Birthday die, which is the perfect size for using as the main card focus, and make a shaker card ... or 3 as it turned out!  Well, who doesn't love a shaker card?  I didn't quite have the right color sequins to coordinate with the card from the kit but trying hard to use what I have and they kind of work I think?  There are lots more great birthday themed items in the kit that I can't wait to work with, including a large present die which I think might be next!


If you made it this far, thanks for sticking with it and hope to see you again next time!

TTFN

Bev x


Sunday, 10 January 2021

Winter Wishes!


Hello Friends and a Happy New Year to you!   Let's hope this one is an improvement on last year and that Lockdowns and Stay at Home orders will soon be a thing of the past.  Although we are not under any mandatory restrictions here in Arizona at the moment, we are trying to be as careful as we can and therefore spending as much time as possible at home.  I don't mind though as for me that means more crafting time - yippee!  Every cloud ... 😉


This week I have been playing with some new Ranger Distress Oxide inks that I recently purchased and have to say they might just be my new favorite!  As well as being really easy to work with (they blend beautifully), you can get some really cool effects due to their oxidizing properties when you add water.   

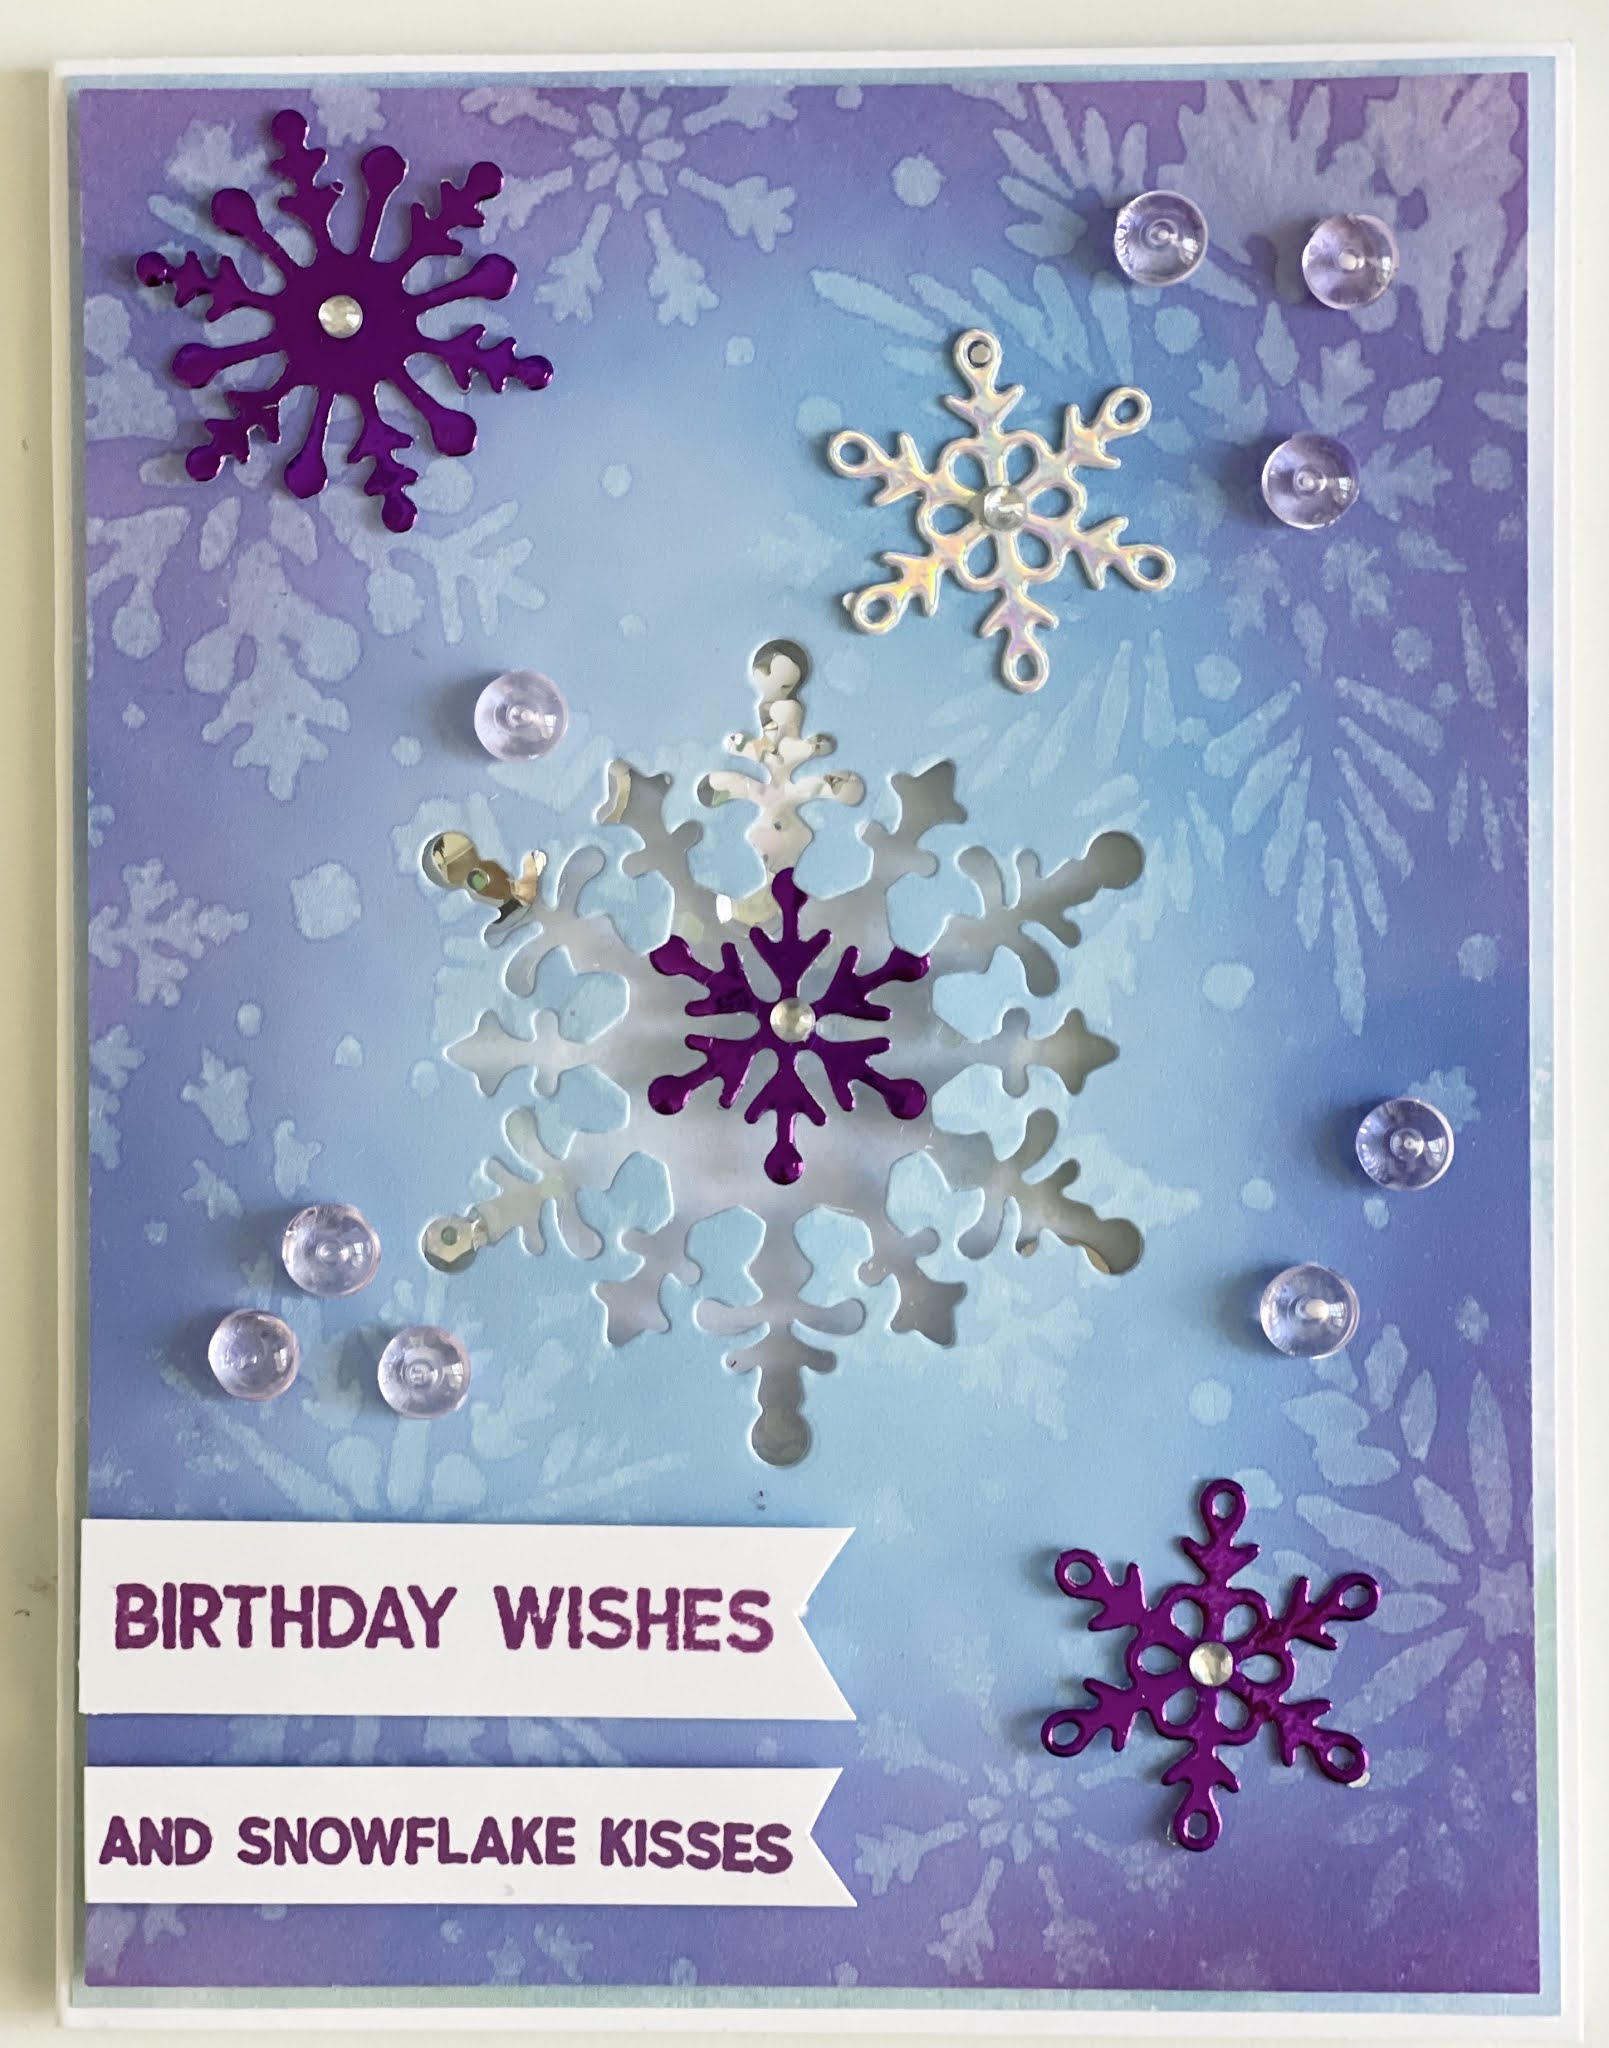
I recently watched a video by Jennifer McGuire where she showed how to stamp/stencil with water onto distress oxide backgrounds and I couldn't wait to give it a try.  (I have linked to that video here).  I blended Tumbled Glass, Salty Ocean and a little Seedless Preserves around the edges to create the inky background and then spritzed with water through a snowflake stencil from the Sara Signature Glittering Snowflake collection at Crafters Companion.  The water reacts with the ink to leave this cool oxidized effect.  So pretty.


Using metal dies from the same Glittering Snowflake collection, I cut out the center and matted onto a scrap of blue glitter card before adding to a plain white A2 card base and then cut a few smaller snowflakes from some iridescent silver card and added a few crystals 


Finally I stamped a sentiment, again using stamps from the same collection and heat embossed with silver tinsel embossing powder.


I loved this effect so much, I created another background in exactly the same way, except this time I used more of the Tumbled Glass and Seedless Preserves and only a little Salty Ocean to make a lighter, softer background.  For this card, I cut a large snowflake from the center and made it into a shaker window filled with chunky glitter and sequins and used scraps of purple metallic card to cut smaller snowflakes for embellishment.  I used the same Seedless Preserves Oxide Ink to stamp the sentiment and finished it off with a few tiny crystals and some lilac dew drops. 💜


I think these will make great cards for those Winter birthdays on my list!

Thanks for stopping by and hope to see you again next time!

Stay warm, stay safe and stay home!

Bev x

Monday, 15 June 2020

Birthday Bucket List!

Hey friends!

As I mentioned in my previous post, Mr Crafty Cow had a birthday this past weekend and so obviously that meant more guy card inspiration!  This one, I made for The Teen to give his Dad after being inspired by something similar I saw in a card shop a while ago.


I created the top layer in Cricut Design Space by creating a text box for the ‘Birthday Bucket List’ using the Boys will be Boys font and then another text box this time using American Typewriter font for the list.  Once I had them positioned where I wanted them I attached them both to a white layer 4.5” x 6.5” and then flattened to turn it into a Print then Cut layer and cut it out on my Cricut Maker.  I cut the bucket using another Design Space Image in black and silver and dry embossed the top layer to add some texture.  I also found the beer bottles on DS and cut 5 of those, again using the Print & Cut feature.  I added some orange card from my scrap box and mounted the bucket on 3D foam tape, tucking the bottles into the top before adding a few sprinkles of clear seed beads to look like ice around the base.   The Dad sentiment is an Anna Griffin die which I cut separately on my Gemini and added to the front of the bucket.  I matted the finished front panel onto some green card stock 1/4” larger all around and then added it to a white 5” x 7”card base.  

Loved how it came out and will definitely be recreating this one again in the future!

Thanks for stopping by and hope to see you again next time!

Bev x


Sunday, 14 June 2020

One for the guys!

Hi folks 

Just dropping in to share a card that I made this week for a friend (actually, it was to give to my DH for his birthday this past weekend as she couldn’t find anything she liked in the shops 😆).

I don’t know about you but I always find cards for the guys the most tricky.  When I get time to craft, I often start with the intention of making a few men’s cards for my stash so that I always have one on hand when I need one, but then when I find inspiration lacking, seem to just switch to auto pilot and before I realise it have made half a dozen cards for the girls!  Doh!

As this was a special request (and also for Mr Crafty Cow’s special birthday!) I had no choice but to dig deep and crack on.  Clearly though this is the best approach for me as I loved the result ... and so did he!


I created a Z card from white card stock and added mats in gold mirror and navy.  I then used my Cricut Maker to cut/draw all the other elements.  Easy peasy!


Thanks for stopping by and hope to see you again next time.

Bev x

Saturday, 7 March 2020

Gamer Boy!


It’s our youngest’s birthday tomorrow and so this week I began the dreaded search for inspiration for a male themed card!  Why are they so hard?!  Anyway, happened upon this digi image from Mo’s Digital Pencil which was just perfect for him.  I colored the image with Promarker alcohol markers and matted on some tech themed patterned papers that i have had in my stash for ever. 

Hope he likes it ... although if previous form is anything to go by he will give it a cursory glance, say “oh thanks” and that will be that!  ðŸ˜‚. Boys!