Pages

Saturday, 25 October 2014

An Aegean Anniversary!

Morning all!

Just back from a very relaxing week in Crete to celebrate our 15th wedding anniversary - warm sunshine, blue skies and the crystal clear turquoise waters of the Aegean .... Ahhhh, bliss!  We had decided to treat ourselves and booked into a 'luxury' resort, however past experiences of this description had so often led to disappointment and a realisation that my idea of luxury and theirs were not entirely the same!  We needn't have worried on this occasion though as the Daios Cove Resort    was AMAZING and we felt thoroughly spoiled from the moment we arrived until the minute we left.  In fact, the 5* service continued even as we arrived at Heraklion airport for our return flight where to our surprise we were met by another member of the hotel staff who guided us through the very busy airport, whisking us to the front of the queues for check in, bag screening (which was in a completely different area!) and delivering us to the security gate in record time, ensuring the whole process was as painless as possible - brilliant! This was the icing on the cake for me as that is the bit I hate the most about travelling home after a lovely holiday and always makes me grumpy!  10 out of 10 Mr Daios!  If you get the chance to go I would definitely recommend it.

So this week's crafty share has to be the anniversary card I made for Mr Crafty Cow.  I used one of the black & white art pads from LOTV coloured with Promarkers and matted onto some gold foil card.  Papers were also from LOTV - the Antebellum paper pad I think - and ribbon from American Crafts.  Hope you like it.


Thanks for stopping by and hope you have a good week
TTFN
Bev x

Sunday, 12 October 2014

A very classy affair ...

Sorry for the delay in this weeks post but we have all been up in Manchester to celebrate my nephew's wedding which took place on Friday ... and what a fabulous wedding it was!

Both my nephew and his bride are architects and have aready redesigned and converted their London apartment from what was once an old bakery into a fabulously sleek two storey abode.  Add to the mix the bride's deliciously quirky and creative styling and meticulous attention to detail and it was evident that this would be no ordinary wedding!

The bride wore a beautiful dress of gold brocade, which she designed herself, accessorised with gold boots and a sparkling ear cuff.  Instead of flowers she carried a stunning bouquet made from vintage brooches and buttons that had all belonged to her own and the groom's grandmothers, and was made by her equally clever Mum. It was so unusual and such a lovely idea - something to treasure forever.


My sister, being a dab hand at making a celebratory cake or two, had offered to make the wedding cake **although I bet she was wishing she hadn't when she received the picture of what they would like (complete with precise measurements - did I mention they were architects?)**

By Tuesday evening it was finally ready and my nephew came to collect it, ready to be transported from London to Manchester the following day **you can see where this is going already can't you?**.  I don't think he had even got a mile down the road when disaster struck and the cake toppled over, completely squashing the bottom layer and reducing it to crumbs!!  Distraught, he drove back to his Mum's where they assessed the damage and determined that whilst a couple of tiers were salvageable, a whole new bottom tier would have to be made.  It was now close to midnight and the wedding was less than 72 hours away! After pulling out all the stops, wedding cake mark 2 was made, except it was now too late for my nephew to collect and so it had to come in the car with us (as we were also picking up my sister on the way).  It was like something out of a Benny Hill sketch ... Mr Crafty Cow and I, youngest & eldest (don't ask me how we managed that!),  my sister, overnight bags, suit carriers, hat (hers, not mine!) and now 2 tiers of a wedding cake!  My poor sister was so paranoid that something else would happen to it that she sat with it on her knee for the whole journey from London to Manchester, ready to be reassembled at the venue!  Whilst not quite the same as the original, which was covered in silver leaf and sadly could not be procured again at such short notice, I think you'll agree that she did a stunning job!


The bride and groom's individual styling and meticulous attention to detail was carried through the theme of the whole day - the lovely bridesmaids ... one in silver, one in gold... the gold & silver heart shaped confetti ...  even a neon sign designed by the bride, and in her handwriting, to indicate where the dancing was to take place.  A very classy affair!


And finally, my own personal wedding highlight .... as you know, we are all huge Bake Off fans in our house **have already got withdrawal symptoms now that it has finished for a other year ... sniff** and so you can imagine my delight when I discovered that we were sitting at the table with none other than the brother of last years Bake Off winner (who can forget the very clever Frances and her squirrel cake?)!!!  What a small world ... not to mention a very fitting end to an extremely stressful week for my poor sister!

Congratulations to Simon and Claire and wishing them a long and happy live together!


Enjoy the rest of your weekend and see you next week!
TTFN
Bev x


Saturday, 4 October 2014

Boxing Clever ...!

Happy Weekend everyone!

Usually by this time of year, the winter woolies would have all been unpacked and probably worn several times by now, the central heating would be on and the winter duvet re-instated on the bed.   Well, not this year.  I can't believe it is now October and we are still being blessed with warm and sunny days and mild nights with hardly a drop of rain to be seen here in Sussex.  The garden is still looking beautiful and all the hanging baskets and pots are still in full bloom! Amazing!

I have a feeling that that may all be about to change very soon though, so what better way to spend those wet and miserable weekends to come than snuggled indoors with a cuppa,  a choccy biscuit and a bit of crafting?!

So this week, I have a tutorial for you.  It is a cute little gift box, with sleeve, bow, tag and even some nesting for the inside, all made from one sheet of 12x12 paper/card!  Yes, really, one piece!  We all need a gift box from time to time, and the ones from those posh stationers are soooo expensive ... this one costs pennies!


1. Take one sheet of 12"x12" paper or card.  If using paper, try and ensure it is of a fairly decent weight and one with a double sided pattern adds a nice contrast for your sleeve and bow, but it is not essential. I am using the Sweet Taffy paper from Stampin' Up!

2. Cut as follows:
  • Cut 2" of nesting (very fine slivers of paper).  You can skip this bit if you don't want to use nesting and you will have a 2" strip left over.
  • Cut a 2" strip for the sleeve.  
  • Cut a 1" strip for the bow
  • Cut a 7x7" square for the box base
  • Cut a 5x5" square for the box lid
  • Keep remaining piece (5x2") to use for a tag
The pieces all laid out should look like this:


3. Take the 7x7 square and score on all 4 sides at 1-3/4".  This will be your box base. (score on the side you want as the inside of your box)


4. Starting at bottom right hand corner, cut up the vertical line to where the two score lines cross (1-3/4").  Turn 90 degrees in anticlockwise direction and repeat.  Do this for all 4 sides turning anticlockwise and snipping each time.


5.  Turn over to the right side, and add glue to the flaps on the opposite side to the cut.   Double sided tape will hold paper but a wet glue will give the best hold, especially if you are using card.


6. Fold all flaps to the inside of the box and glue in place.


7. Now take the 5x5" piece and score at 5/8" along all 4 sides


8.  Repeat steps 4 - 6 to complete the box lid.


9. Scrunch up the nesting and roll into a ball between the palms your hands.


10.  Gently pull apart and add to the base of the box.


11. Next, take the 2" strip for the sleeve and score at 2-3/4", 4-1/2", 8-3/8" & 10".   Fold along the score lines and stick ends together.  This will now slide over your box and lid.


12. Now take the 1" strip and cut into two pieces, 8" and 4".  Notch the ends of the 4" piece as shown.


13.  Glue the ends of the 8" strip together to form a circle and then stick down in the middle to form your bow.


14. Stick this piece to the smaller strip and add rhinestones or other embellishment as desired.


15.  Now you can either use the leftover 2x5" piece and simply fold in half to make a gift tag, or you can add a stamped sentiment to some punched shapes as I did here.


Pretty impressive out of one piece of paper eh?!  Have a go ... it really is easy peasy.

Products used:  Click here to shop


Sunday, 28 September 2014

Going Crackers!


Well ... what a week it has been on the old goggle box this week!  Poor Martha evicted from the Bake Off tent, Lady Edith almost burnt to a crisp in Downton, plus the long awaited return of two favourites in the Crafty Cow household, Strictly and Gogglebox **newsflash ... Jay has had his haircut!!**

Now on to this week's crafting news... 

Have I mentioned that I am in love with Stampin' Up's Envelope Punch Board?  No?  Well, I am totally and utterly besotted! 


Not only can it make ... er .... envelopes, but also a whole host of other super crafty projects, from boxes to baskets to bags to ... crackers!  I know! So cool right?!  **let's hope Youngest is not reading this (highly unlikely), otherwise I would probably be told in no uncertain terms with eyebrows raised 
heavenward that 'NOBODY says that any more and certainly not PARENTS!'**.

I had already seen a tutorial on how to make a cracker using the EPB whilst waiting for mine to arrive (Click here for link) and couldn't wait for it to come so that I could try it out.  I have only had it a few days and so far I have made 4 christmas crackers, 3 pretty boxes, 2 dinky baskets, 1 cute giftbag ... and a partridge in a pear tree!  **erm ... just kidding about that last part ... haven't quite worked out how to make one of those yet** :)

I decided to make sample crackers in 3 sizes ...

A small one, which measures approx 5.5" and uses a 4.5" x 6" piece of card or paper.  I chose some designer paper  from the Sweet Taffy range.


This was surprisingly sturdy considering it is paper, but I wouldn't use it to hold anything on the heavy side.  It would make a really nice individual table decoration holding a chocolate or two ...maybe one of those yummy Lindt chocolate truffles ... **oh great, now I REALLY want one of those ...**.  The big advantage with this size is that you could make 4 crackers out of one piece of 12x12" paper or card.

I then tried a medium one, which measures approx 7.25" using a 6.5" x 8" piece of card stock.  I used  Lost Lagoon and covered with designer paper from the Moonlight paper stack.  This is much more sturdy and would stand up to holding something heavier.  A word of caution though if you are going to use card stock - make sure that it is not too thick as you will need to punch through a double layer on the Envelope Punch Board.  I would recommend testing a punch through two pieces first to ensure that it goes through OK.  If it is too thick, do not force it or you may break your punch!  The Stampin'  Up! card works fine.


Finally, I made another HUGE cracker, which measures just over 11", using a 9.5" x 12" piece of card.  For this one I used up some random christmas papers and card stock that I had in my stash.  Again, this card was not too thick and so had no problem punching through the double layer.


I will be demonstrating how to make one of these at my November workshops and classes, so if you would like to have a go, just let me know! :)

Thanks for stopping by and hope to see you again next week!
TTFN
Bev x


Saturday, 20 September 2014

Autumn Butterflies

I really do love this time of year don't you?  Some of the leaves have started to turn now - we have a particularly beautiful vine in our garden which is turning all shades of red and orange - and we are still being blessed with fabulous weather here in Sunny Sussex.  Best of all, I was able to attend Youngest's Harvest Festival at school, which in previous years I had missed due to being at work.  All the 'Littlies' who just started in the Kindergarten a week or so ago looked so cute in their new uniforms (the obligatory 3 sizes too big to allow for 'growing room') dragging their bags of harvest gifts behind them as they filed in to the assembly hall, and when the Nursery sang "Cauliflowers fluffy and cabbages green ..." I have to confess to having a tear in my eye as I remembered Eldest singing it at his Harvest Festival over 26 years ago!  The funniest moment for me though was when two of the teachers, who were meant to be accompanying the hymns on keyboard and electric guitar (!), and who clearly thought they should have been the additional two members of Coldplay got completely carried away, getting louder and louder, until they had almost drowned out the children's singing!  Haha ... hilarious!

So, meanwhile back at the Crafty Ranch, I held my first Stampin' Up! workshop for a few of my neighbours **actually we make up a girl's team for the local pub quiz and while we may not be the cleverest, we certainly have the most fun and are definitely the loudest!**   It was a really fun morning **coffee, cake and crafting .... what's not to love?!** and by the end of the session everybody had made a really professional looking card to take home with them.  This is the card they all made using Papillon Potpourri stamp set, and the 2014-2016 In Color Stamp pads and card.


Didn't they do well?!


We all had so much fun that we have decided to make it a regular monthly event!  **Note to self ... better get working on some new samples**

I also managed to complete this week's Pastry Bake Off challenge with a late entry of ..........
Profiteroles ... Boom! Smashed it again!

Thanks for stopping by and as usual, lovely have your company.  Until next week ...
TTFN
Bev x

Saturday, 13 September 2014

Seasons of mist and mellow fruitfulness ....!

There is something very beautiful about the onset of Autumn.  The trees have not yet been transformed into the glorious splendour to come, but the early mornings are shrouded in a misty haze and the days are still bathed in warm sunshine.  **ooh, hello, I've gone all John Keats! ...**  An added bonus this week was also being able to watch the deer in the meadow that backs on to our garden with the sun just coming up and the mist still swirling around their feet.  I hope you were also able to catch glimpse of this week's stunning blood red harvest moon?  Wasn't it breathtaking!  Mr Crafty Cow managed to take this rather impressive shot on our point and shoot digital camera ... cool huh?!


So this week, I received several requests to show how I made this cute little gift bag and so I am sharing a short tutorial below which hopefully you will be able to follow (I am afraid I haven't ventured into the realms of Video tutorials quite yet, sorry!)  It really is very simple to make and just uses a few scraps of card and pretty papers, but looks so effective.


Cut a piece of card to 15cm x 5cm and score at 2cm & 5cm*  (I just used a piece of plain white card from my scraps box)

*This measurement can be adjusted to fit your chosen contents, e.g. if your item is only 2cm deep then adjust accordingly and you would therefore score at 2cm and 4cm.


Fold along score lines so that your strip of card now looks like this


Now, cut two pieces of  your chosen decorative paper to match the measurements of your card.  In my case, these were 10 cm x 5cm and 2cm x 5cm.  I used the Moonlight paper stack from Stampin' Up!


Stick to the card as shown


Now cut a contrasting strip of paper 1cm x 16cm*.  Centre along the front flap and stick down.
*Again, adjust according to the depth of your gift packet


Bend gently at each side and then secure to the back.  [I added a glue dot to the back of my small gift and then pressed gently to the back of the card so that it held in place and didn't slide around in the bag.]


Place your gift in it's holder inside a cellophane bag (I used a small card bag) and then cut a piece of card 10cm x 5cm for the gift tag and score in the centre.


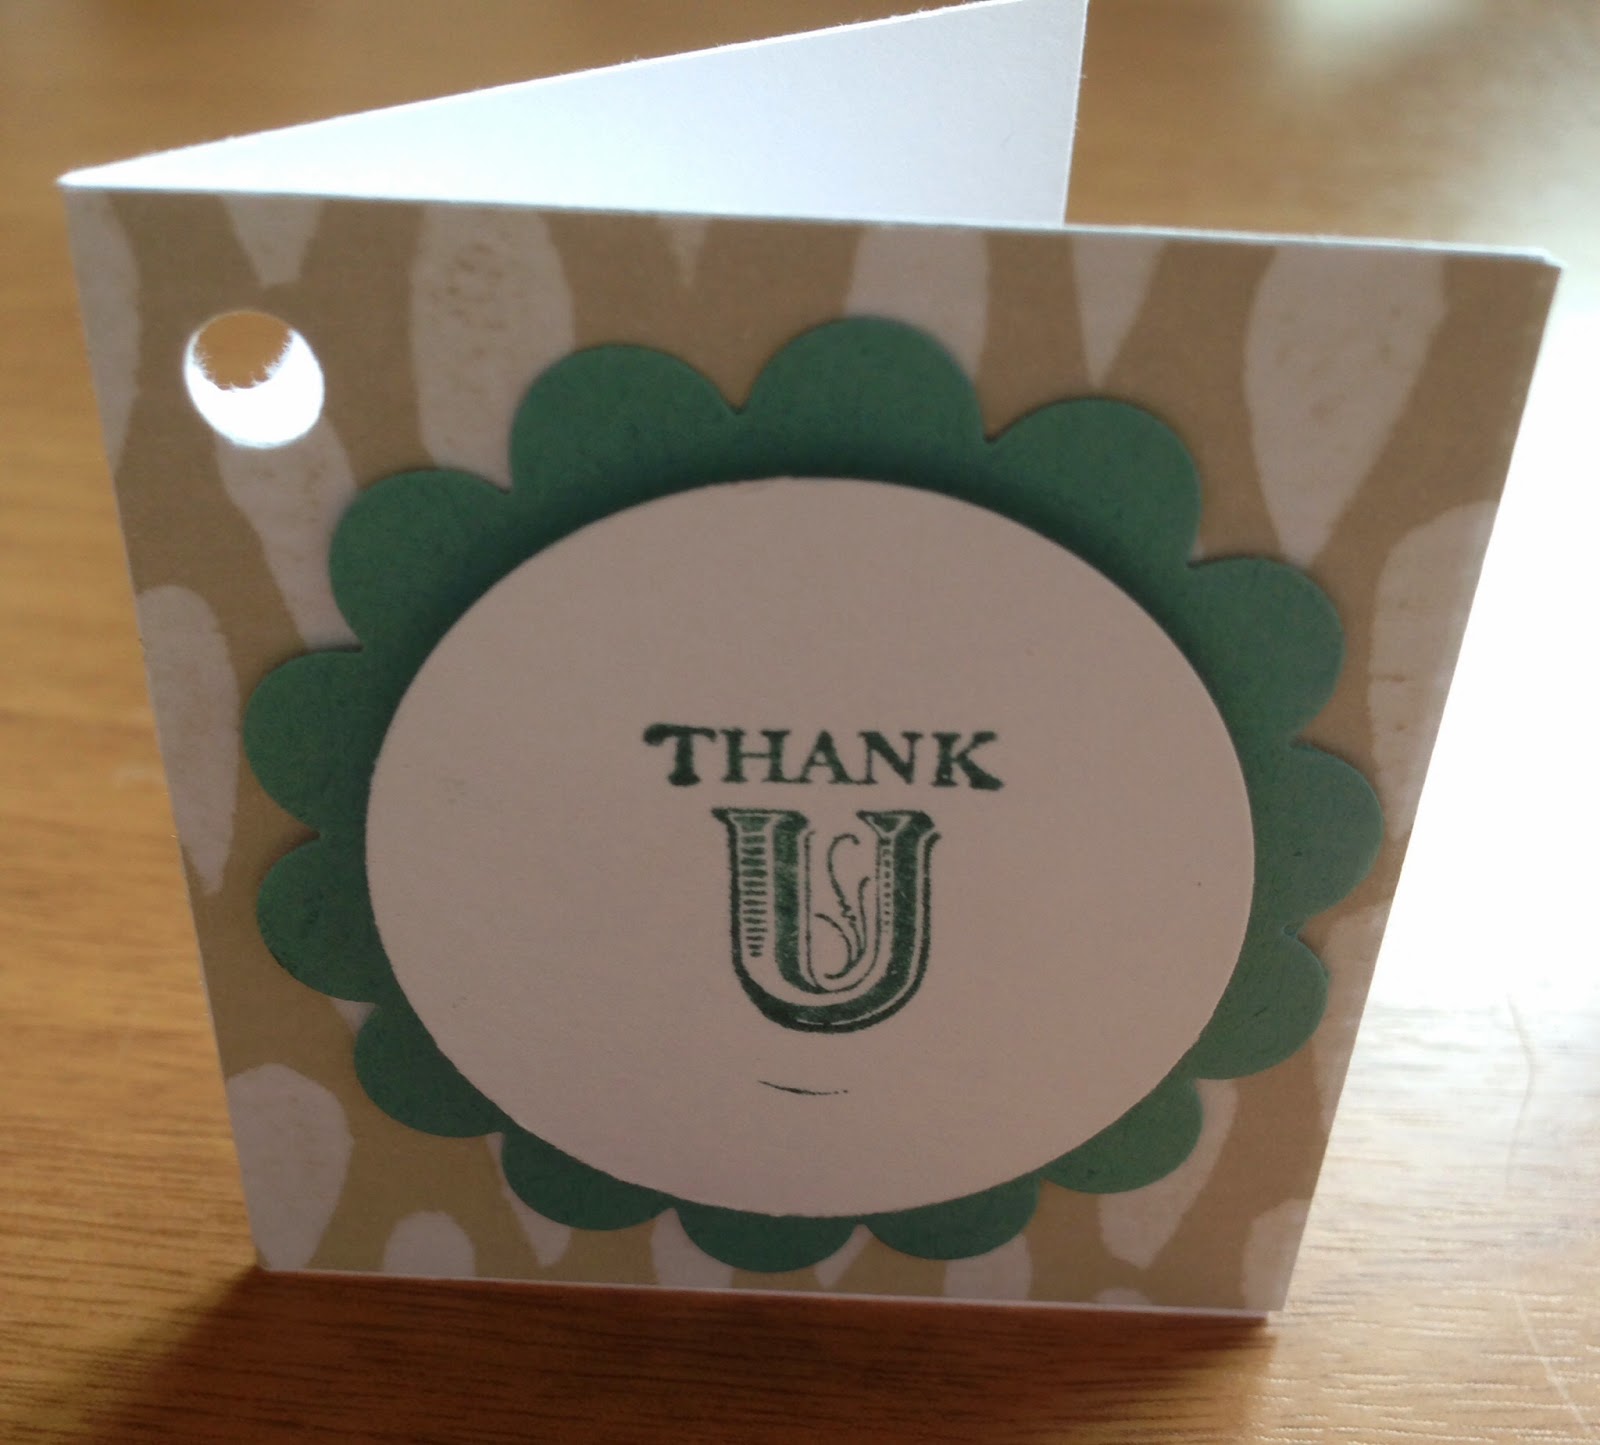
Cover with a scrap of matching paper and punch a small hole in the top left hand corner so that you can thread ribbon through.  I used Scalloped circle punch to punch out a circle in Lost Lagoon card stock and a slightly smaller plain circle punch to punch out in Whisper white to stamp my message on.


I used a sentiment stamp from Stampin' Up!'s Pennant Parade set and stamped in Lost Lagoon ink.


Thread a scrap of ribbon through your tag and then tie around the top of your gift bag.  Done!  These are so easy to make using just a few scraps of card and paper and can transform a small gift or favour into something really special.


As for the Bake Off news this week ... I gave up trying to find a European cake recipe that wasn't a gazillion layers and covered in sickly icing and filled with cream, so I opted for a Nutty Apple Loaf from the Hummingbird Bakery book.  Hadn't made it before but oh my goodness, it was totally scrumptious and will certainly be making it again!  Next week is pastry week ... better get my thinking cap on again ...

TTFN
Bev x


Saturday, 6 September 2014

A Passion for Paper ... and a new business venture!

For as long as I can remember I have loved anything crafty and the satisfaction that comes from making something with my own two hands.  From knitting and cross stitch as a child, **who remembers making those funny raggedy book marks at infant school with the wonky stitching?!**  to scrapbooking, card making and all things paper related for the past 12 years - it is my absolute passion! 

Since I finished my last work assignment at the end of March I have been lucky enough to spend some time at home and whilst I did think that boredom would set in after a couple of months, I can honestly say that I have loved every minute!  I have rediscovered my love of baking (AND even managed to lose 11 pounds in the process … go figure!); I have loved being able to spend quality time with Youngest both after school and during the long summer holidays, and best of all, it has allowed me to indulge my passion for lots of lovely CRAFTING!  So then I got to thinking, wouldn’t it be great if somehow my passion could become my work but still allow me to continue doing all of the above as well?  Did such a thing exist?

Well, apparently it does!  I found and have now joined Stampin’ Up!, where as one of their Independent Demonstrators, I can build my own business whilst continuing to do what I love, except now I also get to share it with others!  Through fun workshops and classes, I will be your 'creative coach', providing fun project ideas, letting you know about special offers, and of course teaching you how to use the fabulous products.  Incidentally, these are not only limited to stamps and inks, although there is fabulous range of these (I want them all!)  but also everything you need to make cards, gifts and packaging, home decor items, memory keeping albums and so much more!    My new One Crafty Cow Stampin' Up! website and shop will be available very soon,  so look out for further updates on that early next week.  In the meantime, if you are interested in hosting a free 'make & take' workshop with your friends, just let me know!

I have also set up a dedicated Facebook page so that you can keep up with all the One Crafty Cow news, offers and project inspiration.  Just click on Follow box over on the right to ensure you receive all the latest updates!

I have of course still been busy creating this week, and made this cute little birdhouse with the gorgeous Potting Shed papers from Craftwork Cards


And of course, I have been keeping up with the Bake Off challenge ... this week was Pies & Tarts.  Youngest requested Jam Tarts as his 'going back to school' treat, and I also made a lovely apple and blackberry pie .... Mmmm autumn is on the way!  Next week is 'European Cakes' .. better get my thinking cap on!

Have a good week!
TTFN
Bev x