Pages

Showing posts with label Boxes. Show all posts

Saturday, 4 October 2014

Boxing Clever ...!

Happy Weekend everyone!

Usually by this time of year, the winter woolies would have all been unpacked and probably worn several times by now, the central heating would be on and the winter duvet re-instated on the bed.   Well, not this year.  I can't believe it is now October and we are still being blessed with warm and sunny days and mild nights with hardly a drop of rain to be seen here in Sussex.  The garden is still looking beautiful and all the hanging baskets and pots are still in full bloom! Amazing!

I have a feeling that that may all be about to change very soon though, so what better way to spend those wet and miserable weekends to come than snuggled indoors with a cuppa,  a choccy biscuit and a bit of crafting?!

So this week, I have a tutorial for you.  It is a cute little gift box, with sleeve, bow, tag and even some nesting for the inside, all made from one sheet of 12x12 paper/card!  Yes, really, one piece!  We all need a gift box from time to time, and the ones from those posh stationers are soooo expensive ... this one costs pennies!


1. Take one sheet of 12"x12" paper or card.  If using paper, try and ensure it is of a fairly decent weight and one with a double sided pattern adds a nice contrast for your sleeve and bow, but it is not essential. I am using the Sweet Taffy paper from Stampin' Up!

2. Cut as follows:
  • Cut 2" of nesting (very fine slivers of paper).  You can skip this bit if you don't want to use nesting and you will have a 2" strip left over.
  • Cut a 2" strip for the sleeve.  
  • Cut a 1" strip for the bow
  • Cut a 7x7" square for the box base
  • Cut a 5x5" square for the box lid
  • Keep remaining piece (5x2") to use for a tag
The pieces all laid out should look like this:


3. Take the 7x7 square and score on all 4 sides at 1-3/4".  This will be your box base. (score on the side you want as the inside of your box)


4. Starting at bottom right hand corner, cut up the vertical line to where the two score lines cross (1-3/4").  Turn 90 degrees in anticlockwise direction and repeat.  Do this for all 4 sides turning anticlockwise and snipping each time.


5.  Turn over to the right side, and add glue to the flaps on the opposite side to the cut.   Double sided tape will hold paper but a wet glue will give the best hold, especially if you are using card.


6. Fold all flaps to the inside of the box and glue in place.


7. Now take the 5x5" piece and score at 5/8" along all 4 sides


8.  Repeat steps 4 - 6 to complete the box lid.


9. Scrunch up the nesting and roll into a ball between the palms your hands.


10.  Gently pull apart and add to the base of the box.


11. Next, take the 2" strip for the sleeve and score at 2-3/4", 4-1/2", 8-3/8" & 10".   Fold along the score lines and stick ends together.  This will now slide over your box and lid.


12. Now take the 1" strip and cut into two pieces, 8" and 4".  Notch the ends of the 4" piece as shown.


13.  Glue the ends of the 8" strip together to form a circle and then stick down in the middle to form your bow.


14. Stick this piece to the smaller strip and add rhinestones or other embellishment as desired.


15.  Now you can either use the leftover 2x5" piece and simply fold in half to make a gift tag, or you can add a stamped sentiment to some punched shapes as I did here.


Pretty impressive out of one piece of paper eh?!  Have a go ... it really is easy peasy.

Products used:  Click here to shop


Saturday, 23 August 2014

It's the weekend, so why not treat yourself to a Pizza?! (except this one is calorie free!)

So, this week was Week 3 of my personal Bake Off challenge and I'm still in the game!  Get in!

I approached this week's category of Bread with some trepidation as just the thought of all that complicated kneading and proving brings me out in a cold sweat!  I have only made one previous attempt at a hand kneaded bread dough before (about 40 years ago!) and the results were ... hmmm, let's see, how did my Domestic Science teacher put it ... 'less than satisfactory'!  I will never forget the humiliation as she cut into my carefully nurtured loaf to reveal one giant air bubble with a crust on top!  Oh the shame!   I therefore decided on a sweet bread rather than a traditional loaf and so I opted for a giant cinnamon roll, topped with a maple vanilla glaze ... I know ... good choice eh?!  The amazing smell as it was cooking permeated the whole house and I was immediately transported to the shopping malls of the US ...  if only ... sigh :(
**Oh, and by the way Miss Bentley, if you happen to be reading this ... not an air hole in sight!**  

In keeping with the Bread theme, this week's crafty make was really the result of another one of my "I want to learn how to make ..." quests, this time being a mini pizza box.  As soon as I saw one of these cute boxes these I thought how useful they would be to fill with either little note cards, sweet treats or small gifts and given that you can make one from a single piece of card, they are very economical too!  A quick search on t'interweb yielded a whole host of tutorials, but I opted to follow one from Dawns Stamping Studio.


It was really easy to do and I have detailed the steps below in case you want to give it a go!:


Your box is now ready to decorate using stamps, decorative papers, embellishments, ribbon, whatever you like - how simple was that?!

I made another sample, just using a piece of A4 cream card stock that had been in my stash for ever, (think it was from one of those 'stack a box with A4 card' from a craft event somewhere) this time using a strong double sided tape instead of wet glue to see which held up better.   Both gave a good bond which held up well, but the wet glue is probably the more robust of the two if you want it to withstand a lot of handling (I used Cosmic Shimmer acrylic glue as I find it dries really quickly and you don't have to have the arms of an octopus to hold them all down while they dry!).  I then experimented with a bit of stamping and some inking around the edges and made a 'belly band' to slide onto the box instead of ribbon (this was made from a 1" x 11" strip of card leftover from the bit I cut off my original A4 sheet).


Thanks for stopping by and hope you enjoyed this week's crafty visit! 

Finally, for those that are curious, here is a picture of the Cinnamon Roll (which didn't last long once the boys got hold of it!).  Can you smell it?!!  ... next week is Desserts ... bring it on!

TTFN
Bev x

Saturday, 16 August 2014

Box It Up - It's a piece of cake!

So sad to hear of the death of Robin Williams this week.  Like many, many others, I feel like I have lost a friend :(  He made me laugh so much in Mork & Mindy, Good Morning Vietnam, Mrs Doubtfire and too many others to mention, but was also incredibly moving in Dead Poets Society and Good Will Hunting.  I hope he is now at peace.  Goodbye ... I'll miss you.  Nanu Nanu x.

So, Week 2 of Bake Off and some fabulously creative biscuit constructions from the GBBO tent!  I loved Chetna's beach scene complete with carousel, and Richard's pirate themed construction was fabulous.  I fear if I was a contestant though, mine would have been much more akin to poor Jordan's 'monster mash' and had Paul Hollywood proclaiming it more  "a complete train wreck" than merely "a bit of a mess"! **now why didn't anyone thnk of that for a theme? Easy!**  I did however manage to deliver on my own personal challenge after last week's episode and baked biscuits ready for this weeks family viewing.  They were not my best creation if I'm honest, and were a plain vanilla shortbread type bake **you can see a picture at the end of this post!** 

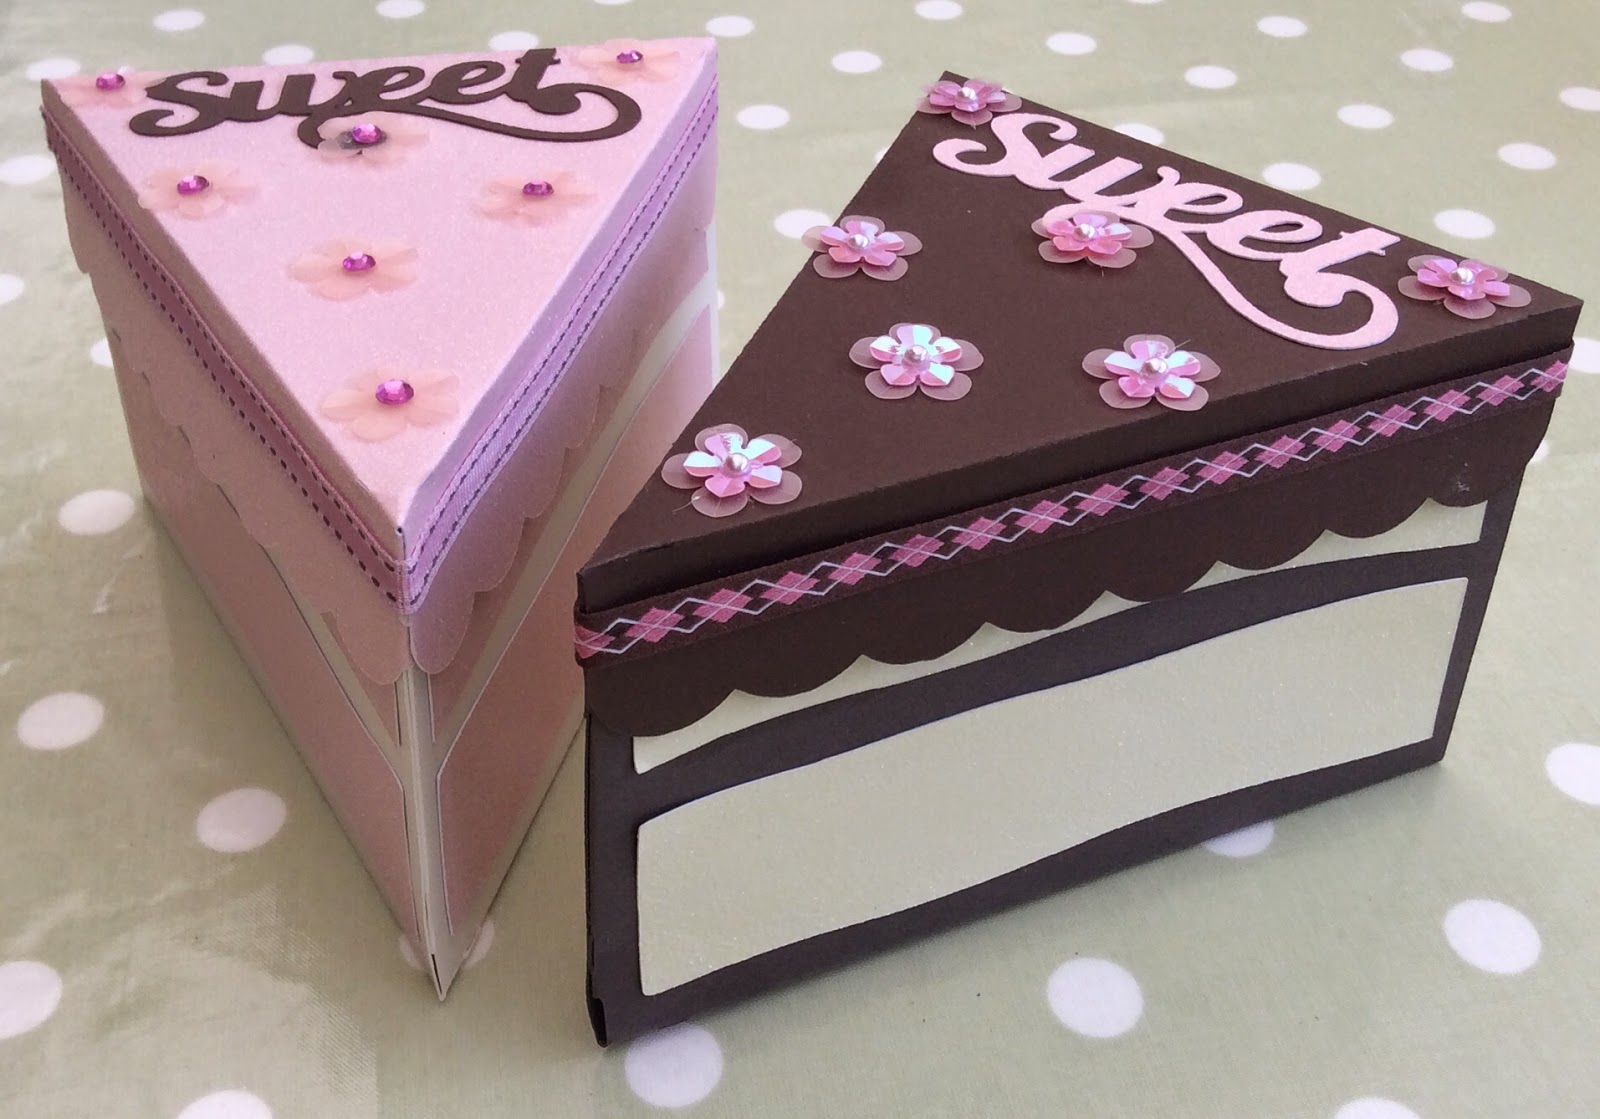
I am clearly still obsessed by all things baking though as my crafty creations this week were literally ... erm ...  a piece of cake. I have been playing with the Cricut Sweet Tooth Boxes cartridge and fell in love with this cute cake box.


I cut these at 11.5" and made them up using a combination of plain Bazzil card stock and sparkly glitter card, finishing them off with some American Crafts ribbon and some cute flower embellishments from my stash.  They are quite big, however, if you are wanting to use these to hold an actual piece of cake or a cup cake, you would not want these much smaller but you could of course scale these down a bit if you just want some cute treat boxes.  I think it would be cool to make more of these, maybe 8 would do it, and then fit them all together to make one large cake as a table centrepiece. Great for a girly party!

Here is a closer look at the inside, designed to hold a single cup cake, but you could leave this out if desired.


and a closer look at one of the individual boxes ...


Whilst still on the subject of boxes, below is an old chocolate box which I 'upcycled' and made into a pretty gift box by covering in these lovely summery papers (from Craftwork Cards) and adding a few paper flowers and a pretty pink organza ribbon.  Voila! How much would something similar cost in a posh card shop? This one cost pennies.  Why not have a go?!


Finally, here is a picture of my 'biscuit bake off' technical challenge ... Hmmmm ... roughly the same size , no soggy bottom, but I'm sure Paul would say ''hmmmm ... not an even bake''  **or as youngest kindly remarked ... "They're ok ... but hardly a show stopper Mum eh?" Cheers... thanks for that...**. Beginning to seriously doubt though whether I will be able to deliver anything edible for next week as it's BREAD ... eeek!


Until next week ... TTFN

Bev x